
Website quality
How to Test Your Website Contact Form from Visitor to Inbox
Verify the public form, error handling, message content, and editor inbox before launch. Includes a manual test log and Cloopp-specific limitations.

The website is published, the contact button looks correct, and the business owner assumes inquiries will arrive by email. Weeks later, nobody has checked the site editor’s inbox. A form test must follow the whole path: visitor finds the form, enters valid data, submits, sees the result, and the responsible person finds the message. This guide tests Cloopp’s published-site contact flow and separates its lead inbox from email notifications or external CRM automation that you should not assume exists.
01
Write down the actual inquiry route
Confirm whether the site has a contact section, an external booking link, or a mail link. Each has a different test. A Cloopp contact form stores submissions for the site’s owner in the editor inbox; that is not automatically an email-forwarding or CRM-sync workflow.
Name the person who checks the inbox and the response expectations your business has actually agreed to. The website can collect a message, but no software feature here guarantees that someone replies. Make ownership visible before publishing a promise such as “we respond within one business day.”
02
Step 1: Prepare a safe test log
Use a test email address you control and a clearly labeled message. Do not include passwords, payment details, real client secrets, or unnecessary personal information. Record the site, page, device context, submission time, visible result, and inbox result so a failure can be traced without guesswork.
Plan a small number of tests: a valid inquiry, empty required fields, malformed email, and a second legitimate message after correcting an error. The public submission endpoint has spam protections and rate limiting, so do not hammer it with repeated test traffic or assume every rapid attempt should be accepted.
Contact-flow test log
Site / public URL: [address]
Contact page or section: [name]
Test account: [email you control]
Message: TEST — verify inquiry delivery, no response needed
Submission time: [time]
Visitor result: [confirmation / error]
Editor inbox result: [present / missing]
Fields preserved: Name; email; full message
Reviewer / action: [owner / fix]
Retest date: [date]
03
Step 2: Test the published visitor experience
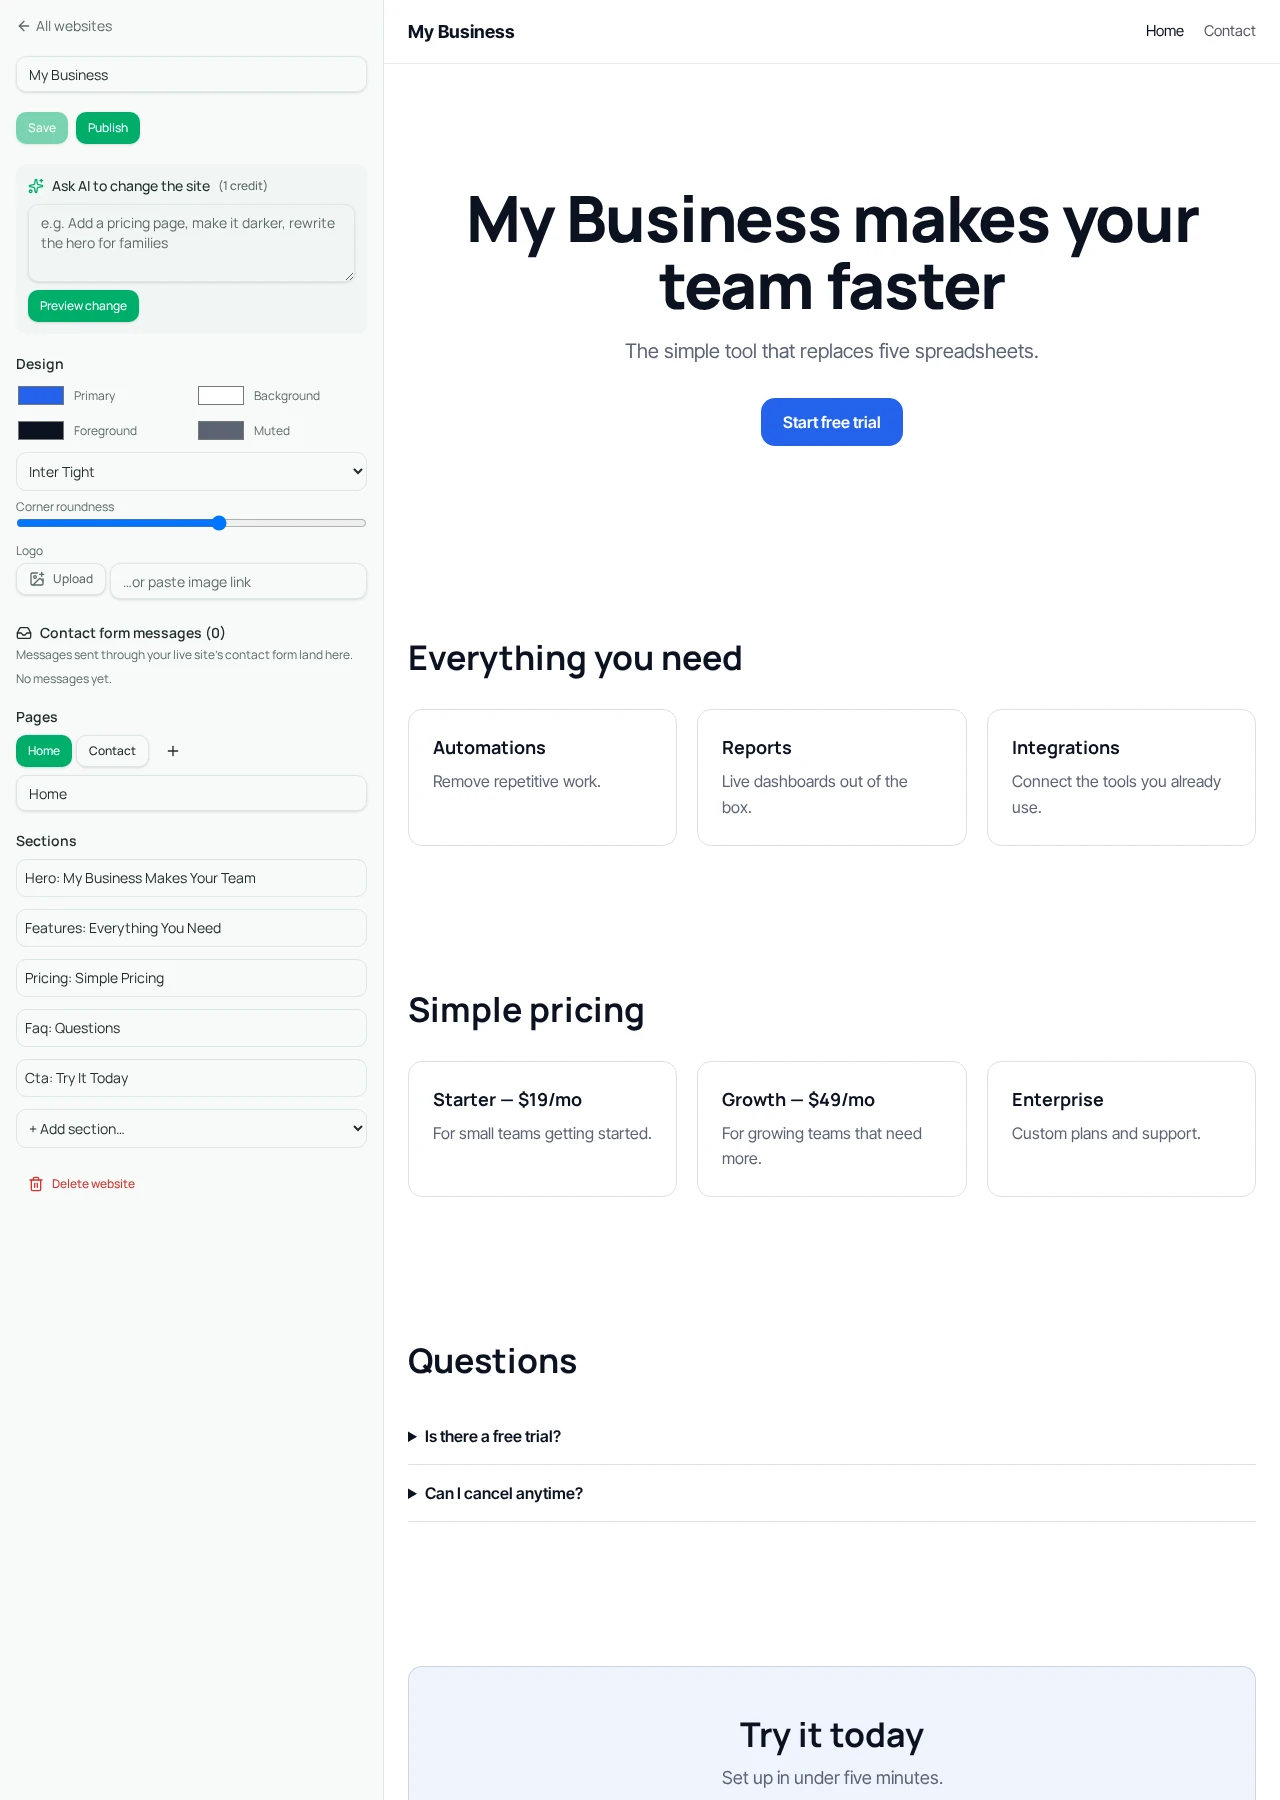
Open the editor, confirm the intended contact section, and publish the site if it is ready for a public test. Use View live and navigate as a visitor. Do not treat a draft preview as proof that the public endpoint accepts messages: published status is part of the submission check.
Fill in the required details and send the labeled test message. Observe the confirmation and any validation feedback. Then check the same flow on a narrow screen or actual phone: fields should be reachable, buttons readable, and error messages understandable without horizontal scrolling or hidden content.
- 1Confirm a contact section is present and the primary button reaches it.
- 2Publish the reviewed test-ready site and open View live.
- 3Submit one valid labeled inquiry using an address you control.
- 4Test empty or invalid fields and confirm the visitor can correct them.
- 5Repeat the valid path on a phone or narrow viewport without rapid-fire submissions.
04
Step 3: Confirm the message in the correct inbox
Return to the website editor for the same site and inspect its inbox. Reopen or refresh the editor if needed because the displayed list is not a guaranteed live stream of new submissions. Compare the submitted name, email, and message with what was stored. Keep the test record separate from genuine lead handling.
Check who can access this site’s inbox and who is responsible for follow-up. Website leads belong to the site and its authorized owner context, not every member of a private company workspace. If a team needs a shared sales process, arrange that operational workflow deliberately rather than assuming a contact submission assigns a task.
Before
- • Form exists in a screenshot
- • Email notification assumed
- • No one owns inbox checking
After
- • Public submission verified
- • Stored lead confirmed in the editor
- • A named owner and response routine
05
Troubleshooting missing leads and misleading expectations
If a submission fails, check published status, required fields, the exact public URL, and the visible error. If several tests were sent quickly, allow for rate limits before trying again. A honeypot helps filter automated submissions, but it is not a guarantee that every unwanted inquiry will be blocked or every unusual browser will behave identically.
If the visitor saw confirmation but the inbox appears empty, reopen the correct site editor and compare the test time and message. Capture the public URL and non-sensitive test details for support if it remains missing. Do not send passwords or backend credentials while reporting the issue.
If the owner expects email delivery, explain the actual inbox route and schedule a manual check. This article does not claim automatic customer-lead email, Slack alerts, or CRM synchronization. Delete clearly labeled test entries when verification is complete, handle genuine inquiries according to your privacy policy, and repeat the test after a major form or page change.
Frequently asked questions
- Will website contact messages automatically email me?
- The implemented flow stores leads in the website editor inbox. Do not assume email forwarding or external notifications unless separately configured and verified.
- Can we test an unpublished site’s public form?
- Public submissions require a published site. A draft editor view is not equivalent to a live end-to-end submission test.
Put it into practice
Verify one inquiry before launch
Send a labeled public test message, find it in the correct inbox, and name the person who will handle real inquiries.
Explore free templates