
Team access
Least-Privilege Client Workspace Access: A Practical Verification Checklist
Design the right workspace boundary, invite clients as members, review join routes, and test access without relying on department names as privacy controls.

A client asks for one reporting procedure. An administrator shares the agency’s whole workspace because the document sits in a folder named after that client. This is a boundary mistake: navigation is not permission. Least privilege means giving the person the smallest appropriate content scope and role, then verifying the result. Cloopp isolates membership by workspace; this guide turns that model into a repeatable client-access check.
01
Draw the content boundary before choosing a role
Write down exactly what the client should see: their onboarding instructions, brand guidelines, reporting explanation, and agreed reference links. Place those in a dedicated client workspace or another workspace intentionally scoped to the same audience. Do not mix another client’s material, internal margins, or staff-only procedures into that space.
The Member role prevents content editing and administration; it does not selectively hide published items within the workspace. Departments and folders help people navigate. They are not per-folder permission layers. Use separate workspaces when audiences must be isolated, even if a single workspace would look tidier to an administrator.
02
Step 1: Prepare a client-facing content inventory
Review each SOP and module as though the client will open it. Remove internal-only comments, links that reveal unrelated projects, and examples containing other clients’ names. External links have their own permissions: a safe Cloopp workspace does not make a broadly shared file-storage link safe.
Keep a short audience note and an access owner in your operating checklist. Record which company contacts need access and when to review it. This inventory is a management practice, not an automatic compliance scan performed by Cloopp. It should be small enough to repeat whenever new material is added.
Client access record
Client workspace: [name]
Purpose: [shared onboarding and reporting]
Allowed readers: [named contacts]
Role: Member
Internal editors: [owner/admins]
Content checked: [SOPs, modules, and links]
Join routes allowed: [individual invitation / other deliberate route]
Review date and owner: [date / role]
End-of-engagement action: [remove memberships and external access]
03
Step 2: Invite deliberately in Team access
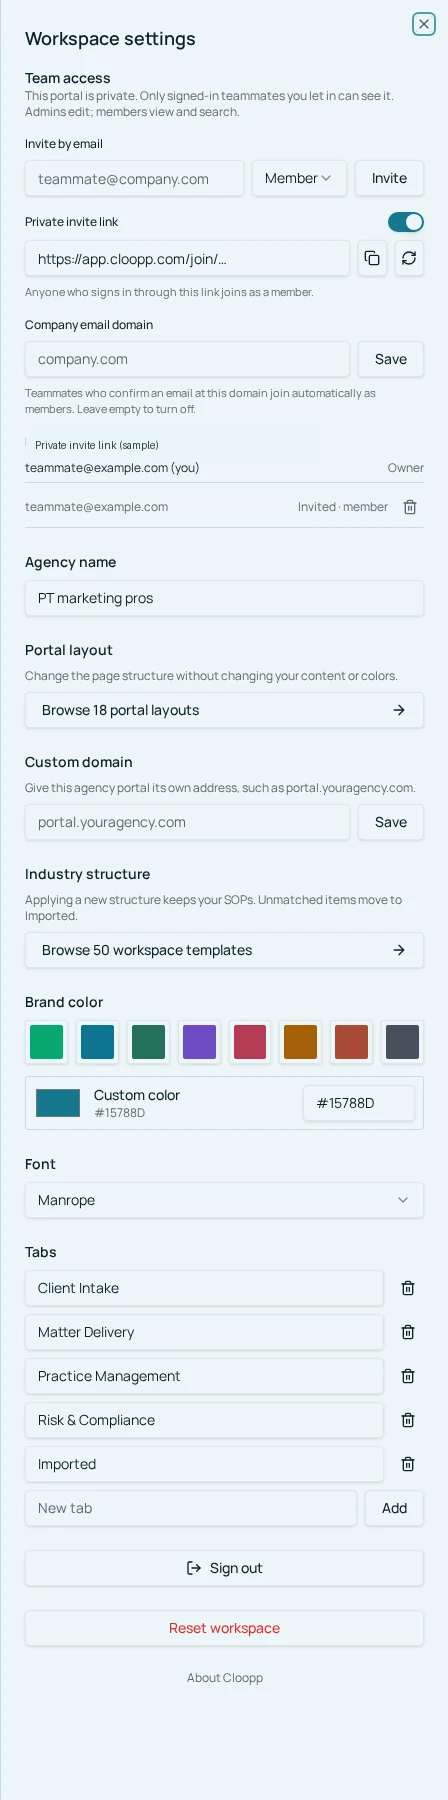
Open Portal settings → Team access as an owner or admin. Invite by email creates access for the specified account. Choose Member for a client who should read and search rather than curate. Where Give access to lists multiple workspaces, tick only the intended destinations rather than reusing the selection from an internal-staff invite.
Review private invite link and company-domain joining settings for this workspace. A link may be appropriate for a controlled cohort, but it can be forwarded. Domain joining may suit employees with verified company addresses; it is not a substitute for naming specific external client contacts when the audience must remain narrow.
- 1Confirm the active client workspace and its content inventory.
- 2Enter the intended sign-in email under Invite by email.
- 3Select Member and tick only the approved workspace destinations.
- 4Inspect link and domain join preferences; disable routes you do not intend to use.
- 5Save the invite and tell the client which account and workspace to expect.
04
Step 3: Verify the ordinary member experience
Use an authorized test member or ask the client to confirm what they see during a short onboarding check. Confirm the workspace name, visible SOPs and modules, search results, and available navigation. Ordinary members should not have the owner/admin content-editing and billing experience.
Try the boundary you care about, not just the successful login. The client should not see unrelated workspaces in the workspace menu or retrieve their procedures through search. Also open external reference links in the client’s account context. A hidden workspace does not help if a publicly shared linked folder exposes the same material elsewhere.
Before
- • One internal workspace with client folders
- • Admin role chosen to avoid access problems
- • Login tested only as the owner
After
- • Intentionally scoped client workspace
- • Member role for readers
- • Content and navigation checked as a member
05
Troubleshooting and access reviews
If an invitation appears not to work, verify the email used at sign-in, the invite’s workspace, and whether the account has joined. Do not promote the person to Admin simply to make a missing course visible; publication and workspace placement are separate issues.
If an invite link has been shared beyond the intended audience, use Reset link to invalidate the old token and review actual members. Resetting a link prevents future use of that token; it does not remove people who already joined. Remove unintended memberships separately, and review pending email invites too.
At an engagement change or departure, review access in each affected workspace and revoke external platform permissions through their own tools. Keep records factual and limited to the business purpose. Least privilege is an ongoing review of audience, content, and role—not a one-time checkbox on the first invitation.
Frequently asked questions
- Can we limit a member to one department?
- The current content boundary is workspace membership. Use a separate workspace when the member should not see other departments’ content.
- Does resetting an invite link remove existing members?
- No. It invalidates the old join token. Review and remove existing memberships separately if needed.
Put it into practice
Verify one client’s actual access
Review the content boundary, use member access, and check the resulting experience before expanding invitations.
Explore free templates